Much Overdue

Two Weeks Abroad has added a new member to our editorial staff.

Amelia – Child Travel Expert

Amelia was born to Aleks and Yuling in December of 2018. She will be advising us on the fitness of our travel experiences for newborns.

Due to the time and effort we spent attempting to fill the role of “Child Travel Expert”, this blog has not received much attention since our trip to Taiwan and Japan. The three of us hope to change that soon.

More seriously, becoming a parent means relearning many things, including how to balance your time. We have resumed traveling, but the writing is trickling in at a slower pace and it will take some time for us to adapt.

We have a bigger trip planned in August of this year, where we will be heading to this Hawaiian island of Kauai for one week (do I need to change the name of the site?) It will be our first plane trip with Amelia. However, this post is about a more modest trip the three of us took back in April 2019 to a near by destination: Salish Lodge and Spa.

Taiwan/Japan 2018 – Day 14 – Heading Home Via Kyoto

This post was written very late due to the chaos of life that surrounded us after returning home. As such, it is much lighter on details than many others. Still, I hope our readers may gather some interesting bits of info.

The Night Before…

img_2813
Free ramen dinner!

As I had mentioned in a previous post, our hotel, Dormy Inn PREMIUM Nagoya Sakae, offered a free ramen dinner after 10 pm. Useful if you end up having an early dinner and want to spend the evening in your hotel without stressing about where to go for dinner.

Back to Kansai Airport by way of Kyoto

Our departing flight, which would take us back to Seattle (after a layover in Taiwan), was leaving from Kanasi airport. To save time on the morning of our last day, we had purchased Shinkansen tickets a couple of days before.

We checked out of the hotel and took the subway back to Nagoya station. We grabbed some pastries and Starbucks coffee from the station for a quick breakfast. Then it was a matter of finding the train.

img_2814

Nagoya and Kyoto are both major destinations, and trains leave every 5 to 10 minutes. This makes it doubly important to ensure you are boarding the correct one.

Since our departing flight was not until the late afternoon, we could afford to spend a little bit of time in Kyoto. If you find yourself in the same situation, Kyoto provides an excellent opportunity for some quick shopping. We were heading for the Porta underground mall, located directly outside of the station.

We intended to place our bags in a coin locker within Kyoto station, but they were thoroughly occupied when we arrived. Luckily we were able to locate some lockers just outside the entrance to Porta. We got the last unoccupied locker.

img_2819
Store your luggage while you shop!

Porta has a large selection of stores with a focus on women’s fashion. Near one end, there is a number of stores selling gifts, so you may want to consider picking up something here for your friends and family at home.

Porta also offers an extensive food court, so you can grab something here for lunch as well.

img_2820
Curry!

Limited Express to Kansai

From Kyoto station, you can take directly the limited express train to Kansai Airport and skip a hectic transfer in Osaka. Purchase the tickets here the same as any others.

img_2823
Limited express to Airport

Note that in addition to the basic fare, you also need a seat ticket (reserved or unreserved). We took this opportunity to purchase a seat in the Green Car (first class), as the tickets were only about 20 USD more expensive. This train will take you all the way to the airport terminal.

img_2827
Limited express ticket for Kansai Airport

Since we had learned a lot about train travel over this trip, I thought it is worth circling back to our first day in Japan and the mistake we made when purchasing tickets.

Most likely, if you fly into Kansai, you will want to take the Airport Express into Osaka rather than the standard JR train. To do so, you need a seat ticket in addition to the basic fare. See the image below.

img_2829
When you arrive on your first day at Kansai, be sure you’re using the right machines for purchasing tickets.

The machines on the left issue basic JR tickets that only cover the fare. This is the part where I ended up confused, because there was no option to purchase a reserved or unreserved seat. If you intend to take an Airport Express train, use the machines on the right, with the green backdrop. These will walk you through purchasing both the basic fare and the seat tickets you need for your journey.

Taiwan/Japan 2018 – Day 13 – Nagoya

Breakfast

We took breakfast in the hotel. Dormy Inn Premium offered a buffet for 1500 JPY per person that included both western and Japanese items.

It was…okay. There is enough there that you can certainly get your fill before starting the day, but I suppose as you’d expect from a hotel breakfast, the quality of individual items was nothing to write about. So I won’t.

Coffee Break

After breakfast, we headed to the Atsuta Shrine by way of the Meijo subway line. Due to an error in navigation on my part, we ended up a stop short of our desired destination. Since we had a little bit of a walk, we stopped for coffee along the way at this little JBCcafe.

This cafe had no menus in English, but the hostess spoke a little English and helpfully explained the menu items. An understanding of Katakana is useful for understanding menu items such as these. Japanese use Katakana characters primarily for phonetically writing out words of foreign origin.

The third menu item, カフェオーレ, is pronounced “ka-fu-e-oo-re”, which is as close as you can get to “cafe au lait” (French for coffee with milk) as you can get with Japanese characters. Just for fun, the one above, アメリカンブレンド, is “a-me-ri-ka-n-bu-re-n-do”, or “American blend”.

Atsuta Shrine

Near the entrance of every Japanese shrine is a communal sink for purifying yourself before approaching the shrine, in a ritual known as “misogi”. First, use the ladle with your right hand to pour some water over your left hand (over the ground, so not to pollute the water). Next, use the ladle in your left hand to wash your right. Finally, pour a little water in your cupped left hand and use it to rinse your mouth (drinking or swallowing not recommended).

The Atsuta shrine is quite large. To the right of the main shrine is an office where you can obtain a mark for your book. To the left of the shrine is the entrance to a path that circles clockwise around the back of the main shrine and gives access to a number of other, smaller shrines. Note that this is considered a sacred space. Keep your voice to a respectful volume and there is signage discouraging photographs on the trail that circles the shrine.

Lunch

The shrine park does have a small restaurant near the west entrance. However, we exited south and headed across the street to Atsuta Houraiken. Established in 1873, this charming restaurant specializes in the same grilled eel dish, Hitsumabushi, that we enjoyed yesterday. We could not pass up an opportunity to have it again at this beautiful restaurant.

This restaurant is quite popular, so do expect to wait before you are able to be seated. At the time we went, the restaurant would assign you a time (in our case, 2:20 pm, 40 minutes wait) to return. There is a small park to the south with benches, trees, and a view of the canal.

When we returned at 2:20 pm, the staff took everyone with a 2:20 pm time in at once, seated us in a waiting room, and then showed us to our tables one by one. The restaurant has a mixture of western-style seating and traditional Japanese furniture, though we did not have the option to choose.

The eel was delicious. I also had a beer with my meal, and Yuling a plum wine with soda. Similar to the last place we tried Hitsumabushi, the price was about 3000 JPY per person, plus extra for the drinks.

Osu Kannon Buddhist Temple

After lunch we took the Meijo line clockwise back to Kamimaezu Station. From here it is about a 10 minute walk to the temple. For that walk, however, you’ll want to exit from the station through exit number 8, and head north 2 blocks before heading west toward the temple. That will take you down Banshoji Dori, a pedestrian shopping street.

The temple itself rises mightily above a large courtyard. The courtyard hosts hundreds of pigeons. There is a small booth where you can purchase food for them for 50 JPY.

The temple itself is a spectacular sight from the ground and equally impressive up close, once you climb the steps.

Be sure to look up at the large paper lantern just inside. If you’d like to purchase anything as a souvenir, or you need a mark for your record of shrine visits, the staff are very friendly and accommodating.

Taiwan/Japan 2018 – Day 12 – Nagoya

Breakfast

We started the day with breakfast at Komeda Coffee.

Komeda Coffee is a Japanese take on an American breakfast restaurant. The restaurant was cozy with lots of wood paneling. Staff spoke English and there was an English menu. Any drink order between 9 am and 11 am (including simply coffee) comes with a free side of toast and another little side such as a red bean spread or boiled egg.

Once we saw the size of our complimentary sides, we realized ordering additional entrees was a mistake. I ordered thick toast with red bean paste (basically a larger version of what is pictured above) and Yuling ordered a miso-pork cutlet sandwich.

We were not able to finish the port cutlet. (Just by itself, that would have been enough breakfast for the both of us.)

SCMAGLEV and Railway Park

After breakfast, we headed to the SCMAGLEV and Railway Park, perhaps the single destination I have been looking forward to most for this entire trip. SCMAGLEV and Railway Park is a railroad museum owned by JR Central (Central Japan Railway Company). It is most easily reached by taking the Aonami Line from Nagoya Station to Kinjofuto Station (the other terminus of the line). Note that when you’re looking for the Aonami Line in Nagoya Station, it is neither a subway train or a JR line, and has its own ticket machines and turnstile. Follow the signs for the Aonami Line to the southwest corner of the station.

I make no secret of being fascinated by trains. It was therefore an extra treat to stand at the front of this train. Unlike a lot of the other trains we had been one, this one had an open view into and through the operator cab. One interesting detail is that right in the middle of the console, there is still a place for the driver to place his pocket watch, and that still remains the authoritative source by which they check time against the timetable.

The museum is right outside of the Kinjufoto station and very difficult to miss. Admission is 1000 JPY per person. There are audio guides available to rent, but we still felt a little burned but the quality of audio tours so far on the trip, so we didn’t bother.

The first room houses three trains which represent various eras of Japanese railway technology. On the left is a steam locomotive, in the middle a Shinkansen train (driven by electricity), and on the left a prototype maglev train. (The maglev train uses electromagnets to both float above the railway and propel itself. A long-range maglev line is currently under development in Japan.) Every few minutes a movie plays in this room. Be sure to stick around long enough to see it. The text of the movie is only in Japanese, but figures such as dates and maximum speeds reached are still easy to pull out.

The next, larger room houses a larger collection of various locomotives and rolling stock from throughout Japan’s history. If you’re interested at all in trains, this museum is worth at least 2 to 3 hours of your time. Not all exhibits have English translations, but enough do that you can still enjoy the museum without reading Japanese.

On the right side of the main hall is an expansive model railway.

Next on the left is a simulator where you can experience what it is like to operate a Shinkansen train. Unfortunately, the number of tickets are very limited and sell out quickly. If this is something you feel you have to experience, it would be best to arrive when the museum opens.

Fortunately, if you are not set on the Shinkansen, there is a larger collection of train simulators for conventional trains. You need to get a ticket from a machine near the simulators and wait in line. (In theory, these tickets can also sell out, but we were there a little before lunch, and while I had to wait in line for 20 minutes or so, I had no issues getting a ticket.)

Based on what I observed standing at the front of the train on the way here, the controls are all faithfully reproduced in the simulator. The instructions are only in Japanese, but the staff speak a little bit of English and can get you started with the basics. The simulator runs you through a course where you have to make four stops on a schedule, with the goal being precise control of the speed.

On the opposite side of the main exhibition hall there are interactive displays which explain how various train related technologies work, such as signaling to keep trains separated, ticketing, and Japan’s automated earthquake detection and response system to prevent derailments.

Arakogawa Park

On our way back to Nagoya station via the Aonami Line, we stopped at Arakogawa-koen station to visit Arakogawa Park, located immediately outside the station.

Although we were too early in Osaka to witness the full cherry bloom, we arrived just in time for Nagoya.

The park has some simple fields, gardens, and restroom facilities. There were a couple of food carts there at the time as well. However, the biggest attraction was of course the flowering trees, which stretched down the canal.

The park was filled with people picnicking under the trees and watching as the wind caused the blossoms to fall and swirl about like snow. We spent some time strolling here before returning to the station and continuing back to Nagoya Station.

Shinkansen Tickets

Since we were passing through Nagoya station, and to save time on the morning of our departure, we purchased Shinkansen tickets from Nagoya to Kyoto. At Kyoto, we will purchased Limited Express train tickets that will take us directly to Osaka’s Kansai airport. I used cash this time and didn’t bother with trying to get a credit card to work.

Lunch

For lunch, we decided to find a restaurant selling Hitsumabushi. Hitsumabushi is a local specialty of Nagoya. We located a restaurant near Nagoya Station, on the 9th floor of the Meitetsu Department Store: Maruya Honten. Staff speak a little bit of English and they do have English menus available.

A typical price is around 3000 JPY. The dish consists of roasted eel served over rice, but there is a special process for eating it.

The eel and rice is eaten one quarter at a time. To begin, place scoop out the first quarter and place it in the provided bowl. This first quarter is eaten as-is, to most appreciate the direct flavor of the eel and rick.

The second quarter is eaten with some of the seasonings provided, such green onion and dried seaweed.

The third quarter is eaten with the seasonings, and also a little bit of the soup that is provided on your tray. The final quarter can be eaten how ever you prefer. If you’re concerned you will forget the protocol, most restaurants will provide an illustration in either the menu or on a separate card brought to you with the meal. Maruya Honten serves you a nice little cup of green tea to finish out your meal.

If you are in Nagoya, you must eat Hitsumabushi for at least one of your meals.

Togan-ji Temple

To finish out our day of sightseeing, we took the Higashimyama Line subway from Nagoya Station to Fushimi Station to visit Togan-ji, a Zen Buddhism temple. This temple was smaller than many of the other more popular ones, but we also found it more quiet and peaceful. There is no entrance fee.

After passing through the main gate, the main temple building is on your left. As long as there is no event going on, you may take your shoes off and quietly enter to take a look.

Please do keep in mind that these temples, while often having historical significance, are primarily places of practice for residents. Maintain a respectful volume and mindset. As a personal rule, I generally avoid photographs inside unless it is primarily configured as a tourist destination. If you do take photographs, you should be discrete and respected. Some sites may explicitly disallow photographs.

Opposite the main building and down some stairs there is a large, bronze Buddha.

Ice Cream

Before settling in for the night, we stopped at BerryOne (written as ベリーワン in Japanese) for some ice cream before bed.

A small cone costs about 500 JPY, but includes a number of toppings folded into an ice cream. There is no English menu, but there is a menu with pictures that you can point at. The staff may hold up a cone and bowl, followed by a large or small to try to figure out your exact order. The shop is small, but there are a couple of tables in the back for seating.

Free Ramen Dinner

For dinner we had the free ramen served in our hotel between 9:30 pm and 11:00 pm. The ramen was basic (with just noodles, broth, some green onion, and bamboo shoot), but filled in the space left by the ice cream.

Taiwan/Japan 2018 – Day 11 – Yudanaka to Nagoya

Unwinding the Journey

Today we travelled back from Shibu Onsen to Nagoya, by means of the train departing from Yudanaka station. There was plenty of time to eat breakfast at the hotel again and pack before our hotel-provided transport back to the station at 9:40 am. Although Shibu Onsen accommodations were the most expensive part of our trip (running around 200 USD per night), the meals we ate there were some of our best and the onsen experience is unforgettable.

The train departed Yudanaka Station quite full of tourists also checking out that morning.

Layover in Nagano Station

After about 50 minutes, the train from Yudanaka arrived at Nagano Station. We had about an hour layover before the Limited Express train to Nagoya. Within that hour we had to purchase tickets for our next segment and, avoiding the same mistake as last time, purchase a boxed lunch to eat on the long train ride.

We encountered two difficulties with the first goal. Unlike the machines in Osaka, the automated ticket machines in Nagano would not take my MasterCard. Furthermore, the ATM located closest to the ticket machines did not have an English mode, making it too risky to attempt to navigate. Not wanting to waste any more time, we stood in line for a ticket agent. Although the line moved sluggishly (there are many foreign tourists that needed help plotting the course to their next destination), they had no difficulty accepting our credit card. The lesson seems to be that in addition to carrying enough cash for your next accommodations and food, you’ll save time by having cash to pay for your next train tickets (the automated machines do accept cash).

Next we purchased a bento box to eat on the train from a vendor in the train station (there are many to choose from). In the time remaining I was also able to locate a 7-Eleven ATM on the first floor of the train station, from which I was able to get some additional cash.

We then settled in for our three hour ride to Nagoya.

Hotel in Nagoya

There was not much time left in the evening for activities in Nagoya. We checked into our hotel, Dormy Inn Premium.

This hotel is located a few blocks off of the Higashimaya subway line in Nagoya. Rooms are small (average size by Japanese city hotel standards), but the hotel is clean and feels modern. The biggest draw of this hotel is the luxurious public bath on the second floor. There is both an indoor and outdoor tub for soaking, a cold pool, and a sauna. We felt right at home after our time at Shibu Onsen. In the same facilities, the hotel also provides free laundry (though the dryer costs 100 JPY per 20 minutes). For those not interested in the public bath, the rooms do come equipped with their own showers.

Dinner in Nagoya

For dinner we ate at a ramen restaurant: Ichiren Nagoya Sakae. The format of this restaurant is certainly unconventional by western standards, but it is tailored for efficiency for both the staff and the guest.

To pay for your order, you start by purchasing tickets near the entry.

It is a bit like ordering from a vending machine, but rather than the actual item coming out, you get a little paper ticket. I ordered the basic ramen dish, with a side of a soft-boiled egg and seaweed.

Then, you go inside and take a seat at a long counter. Near the entrance there is a board with lights that shows you which seats are free. Go take a seat. There is a little pad of forms where you mark how specifically you’d like your ramen cooked, and which additional sides you’d like.

Next, push a button to summon a server. They will collect your form and your paper tickets that show you paid. A few minutes later, your food will appear.

If you’d like some water, there is a tap right at your table!

Back at the Hotel

Since I forgot to order one with my ramen, I finished out the evening with a can of Japanese beer from the vending machine.

Taiwan/Japan 2018 – Days 9 and 10 – Shibu Onsen

Introduction

This post will cover both full days we spent in and around the Shibu Onsen resort. Since this destination was in the middle of our time in Japan, we used it as an opportunity to rest from the hectic city life. With no trains to catch, no subways to squeeze into, and breakfast and dinner provided by our accommodations, Shibu Onsen allowed us to stretch out a bit and take things at a slower pace.

Breakfast at Matsuya Ryokan

As mentioned in the last post, we spent our first night of three at Matsuya Ryokan. The breakfast served was similar to the dinner we had the night before: a number of small plates consisting of pickled vegetables, rice, fruit, fish. It was topped off with a fried egg that cooked on the little burners while we sat at the table.

I’ve since learned that this type of traditional food is called washoku.

Like the other Ryokan, Matsuya provides free transportation to the Snow Monkey Park and also back to the Yudanaka train station. Since we were staying the next two nights at a ryokan just one block away, Matsuya kindly offered to transport our excess baggage for us after dropping us off at the Snow Monkey park. This saved the trouble of having to pay to check our bags at the museum outside of the snow monkey park.

Snow Monkeys

No trip would be complete to this region without a short walk up to see the snow monkeys. The snow monkeys, more formally, Japanese Macaques, are best known for utilizing the hot springs in the mountains above Yamanouchi during the cold winter months.

The area around the hot springs typically used by the monkeys is called the Snow Monkey Park. The entrance is a little less than 2 kilometers away from Shibu Onsen, if you walk. Most hotels will happily drive you this distance from the morning. From the parking lot it is an easy 1.6 kilometer hike to reach the actual park entrance. Aside from a short span of shallow steps at the beginning, the trail is flat and doesn’t require boots to traverse in the dry months. (If you were to come here when there is snow on the ground, it would be a different story. You can rent winter boots at the beginning of the walking portion.)

Eventually you will come to a small gate house which sells the tickets for admission to see the monkeys. The entry fee was 800 JPY per person. The gatehouse also includes a small gift shop and restroom. However, this is no food for sale up here, so make sure to eat before your hike. There are signs stating that the snow monkeys are not guaranteed to come down into the park if it is mating season or sufficient food exists at higher elevations. Luckily they were present when we were there.

[instagram url=https://www.instagram.com/p/BgyGMhRgUV8/]

A telephoto lens is useful for capturing more natural images, but you will almost certainly have the opportunity to see a monkey close up. The macaques are not shy at all and will walk very close to humans. This is especially true when they want to utilize the same bridge that people use to cross the water. The park is relatively small. Don’t plan to spend more than an hour observing the monkeys. At the time we were there, none were bathing in the hot springs due to the relatively warm temperature.

On the way out, near the parking lot, we stopped at Enza for a matcha latte. There is a bus that leaves from a bit downhill of the parking lot to return to Shibu Onsen. Enza posts a schedule near there entrance, so it may be useful to consult it (ideally before hiking to the snow monkey park).

At the time we finished our latte, there was over an hour until the next bus, so we walked the 2 kilometers back to town. Since it is downhill all the way, it isn’t a very strenuous walk, and it has the benefit of giving you a closer-up view of some of the countryside and small streets.

Lunch at Shibu Onsen

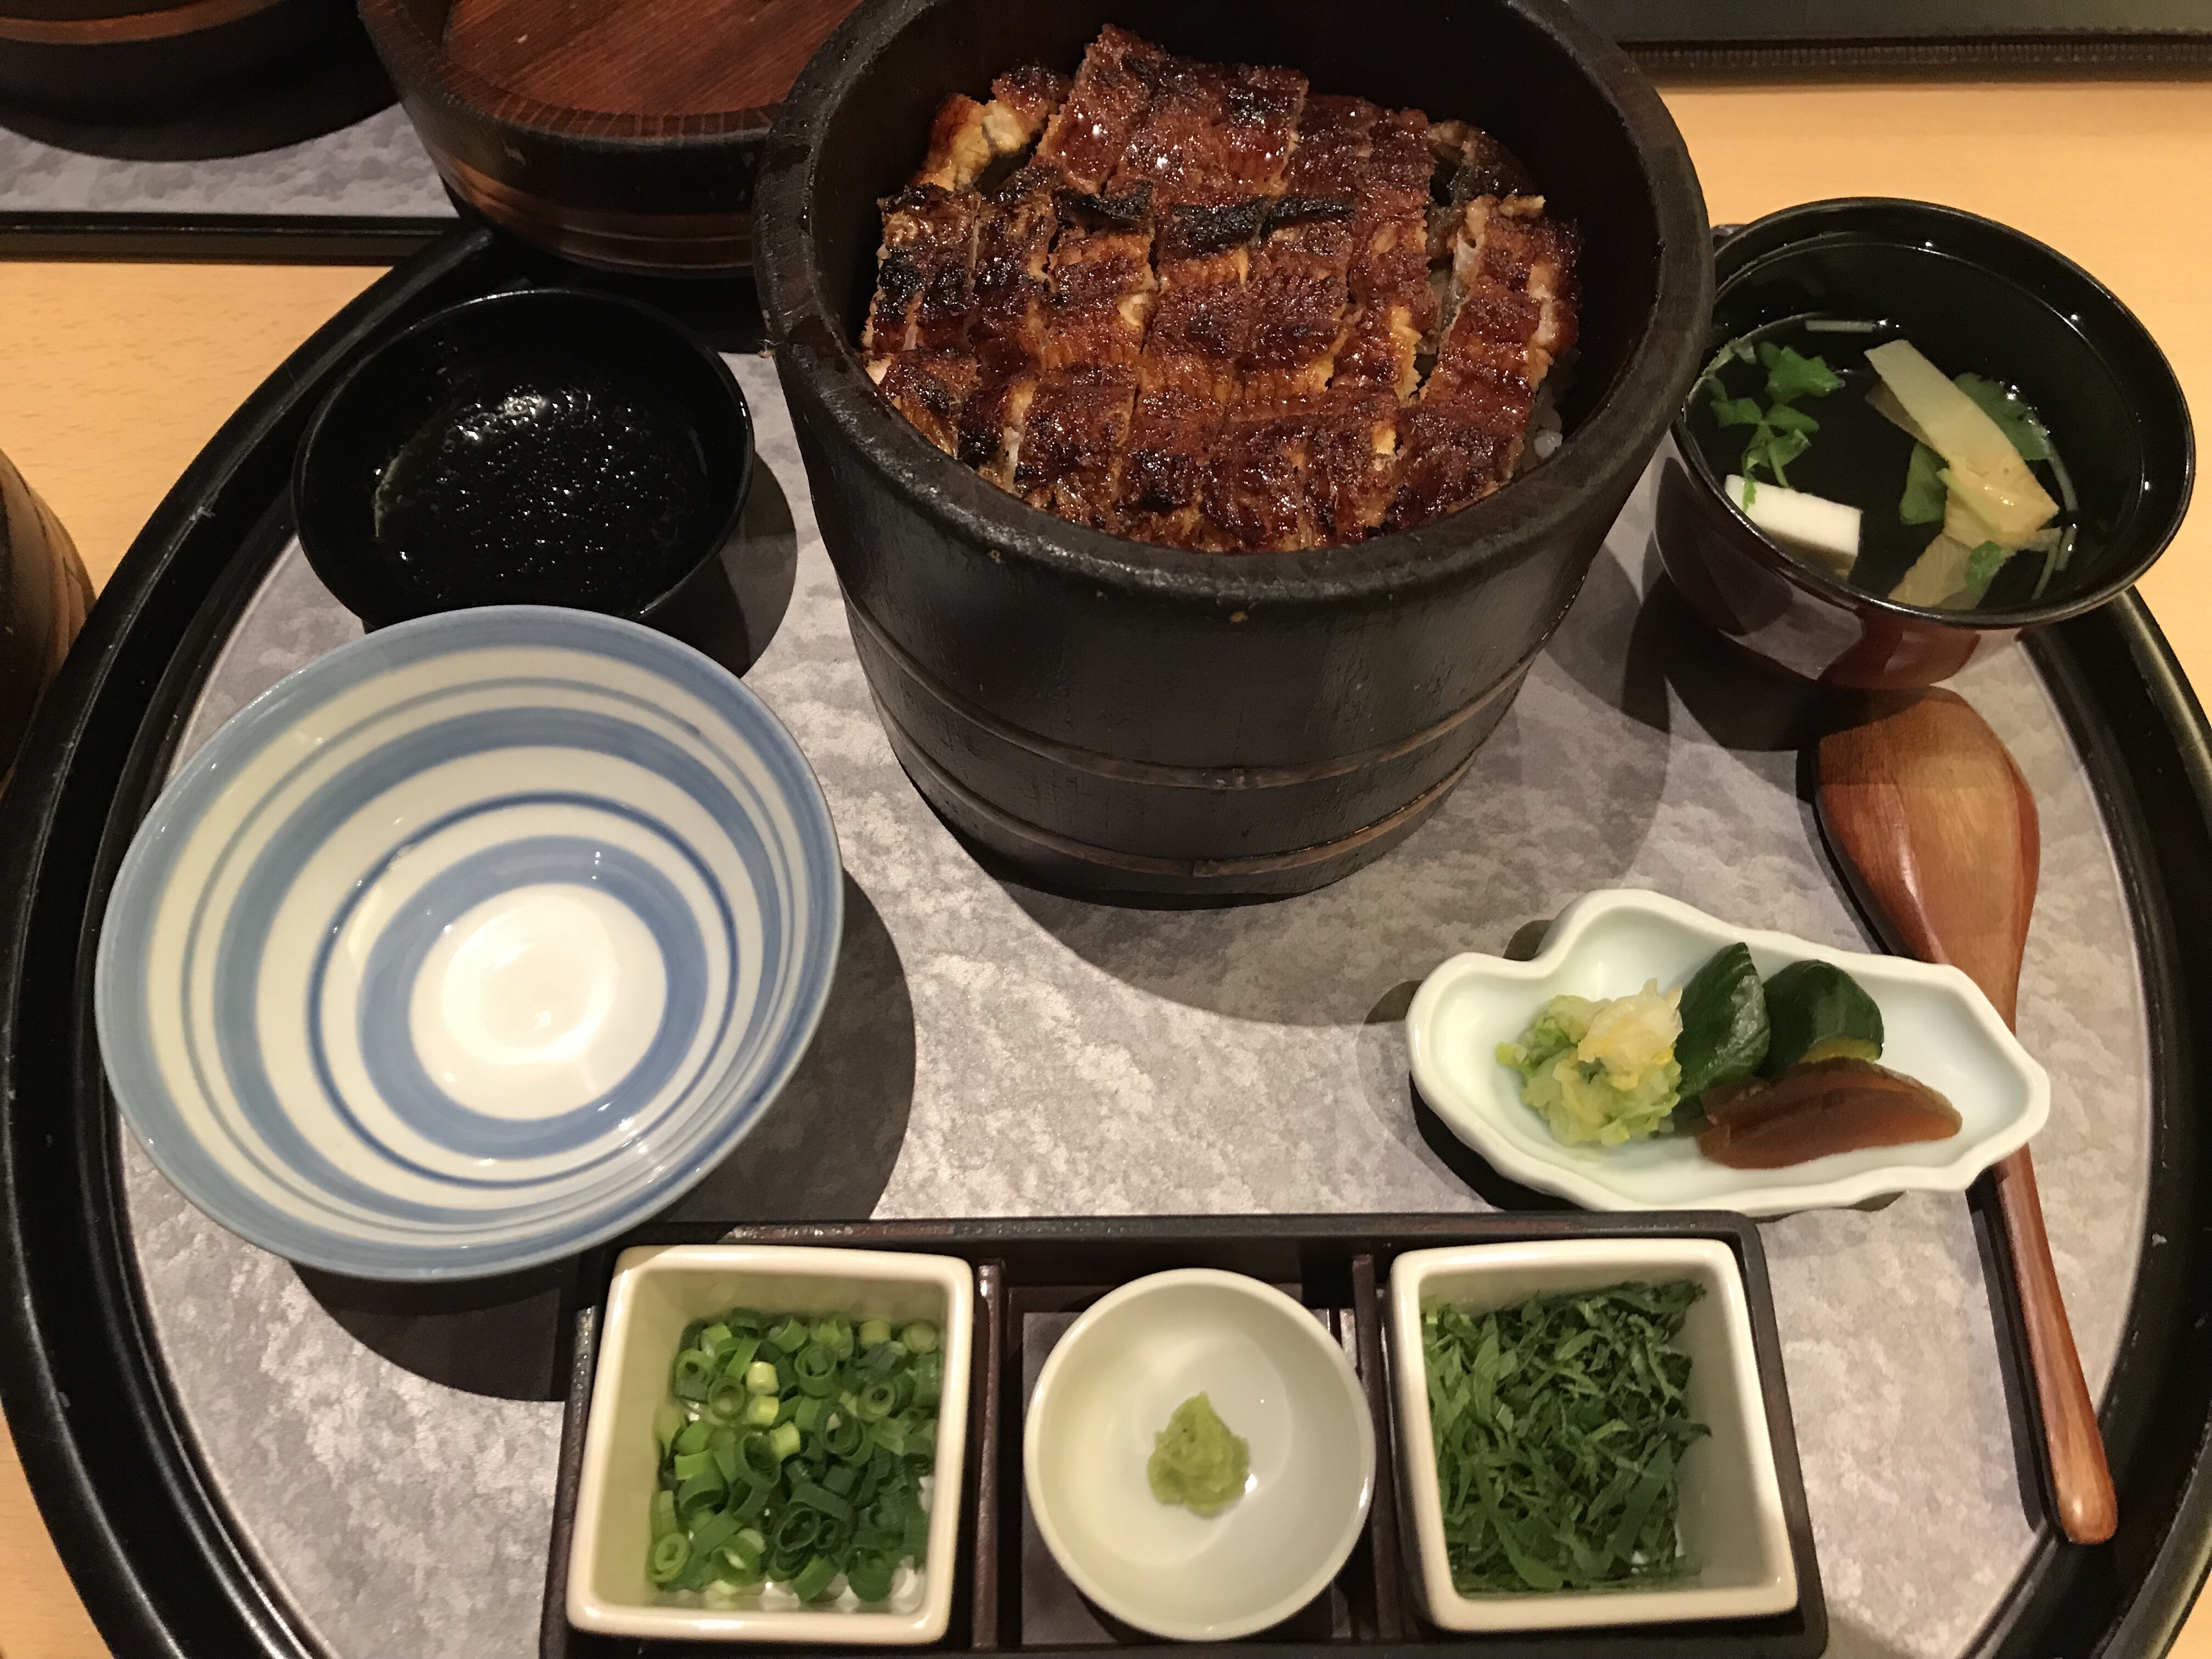
At this point of our trip, we had not yet had any ramen, so we went to a ramen shop in Shibu Onsen: Ramen Tokumi.

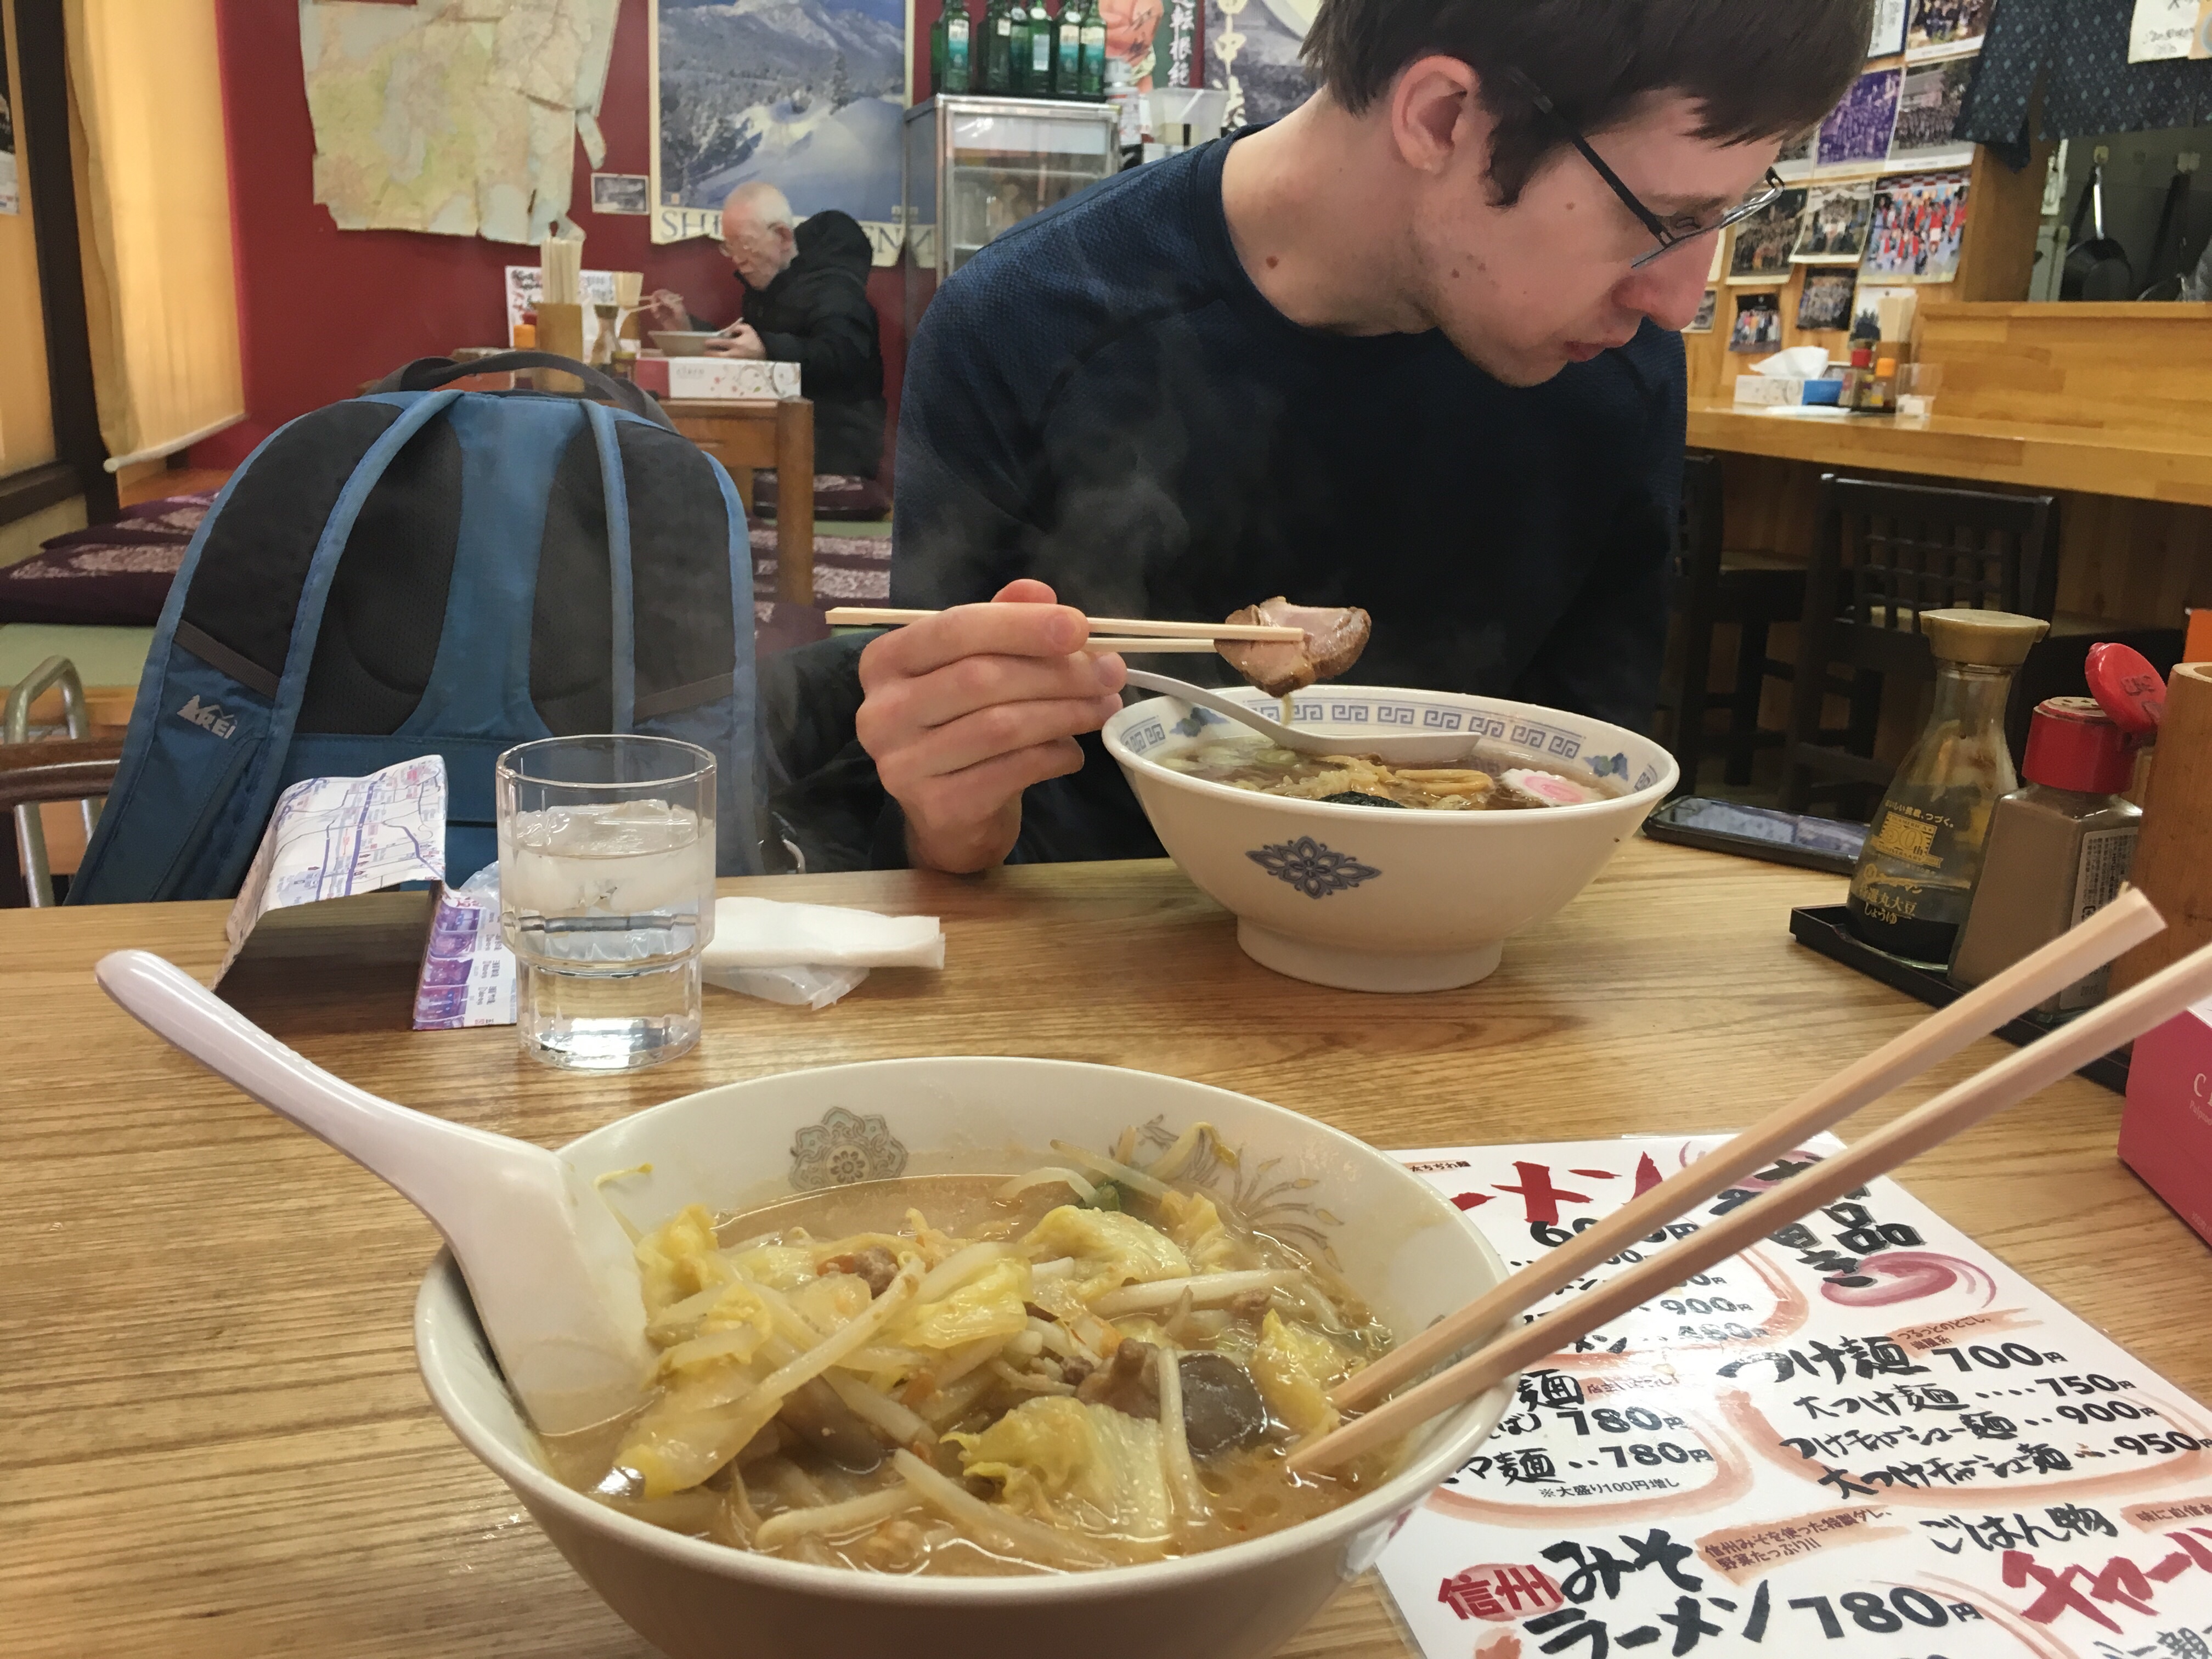
The restaurant offers an English menu with pictures. We both had ramen, which is served as a brown of ramen noodles with broth, a small cut of meat, and a few vegetables stacked on top. Dishes were about 700 to 900 JPY. The meal was simple yet delicious and filling.
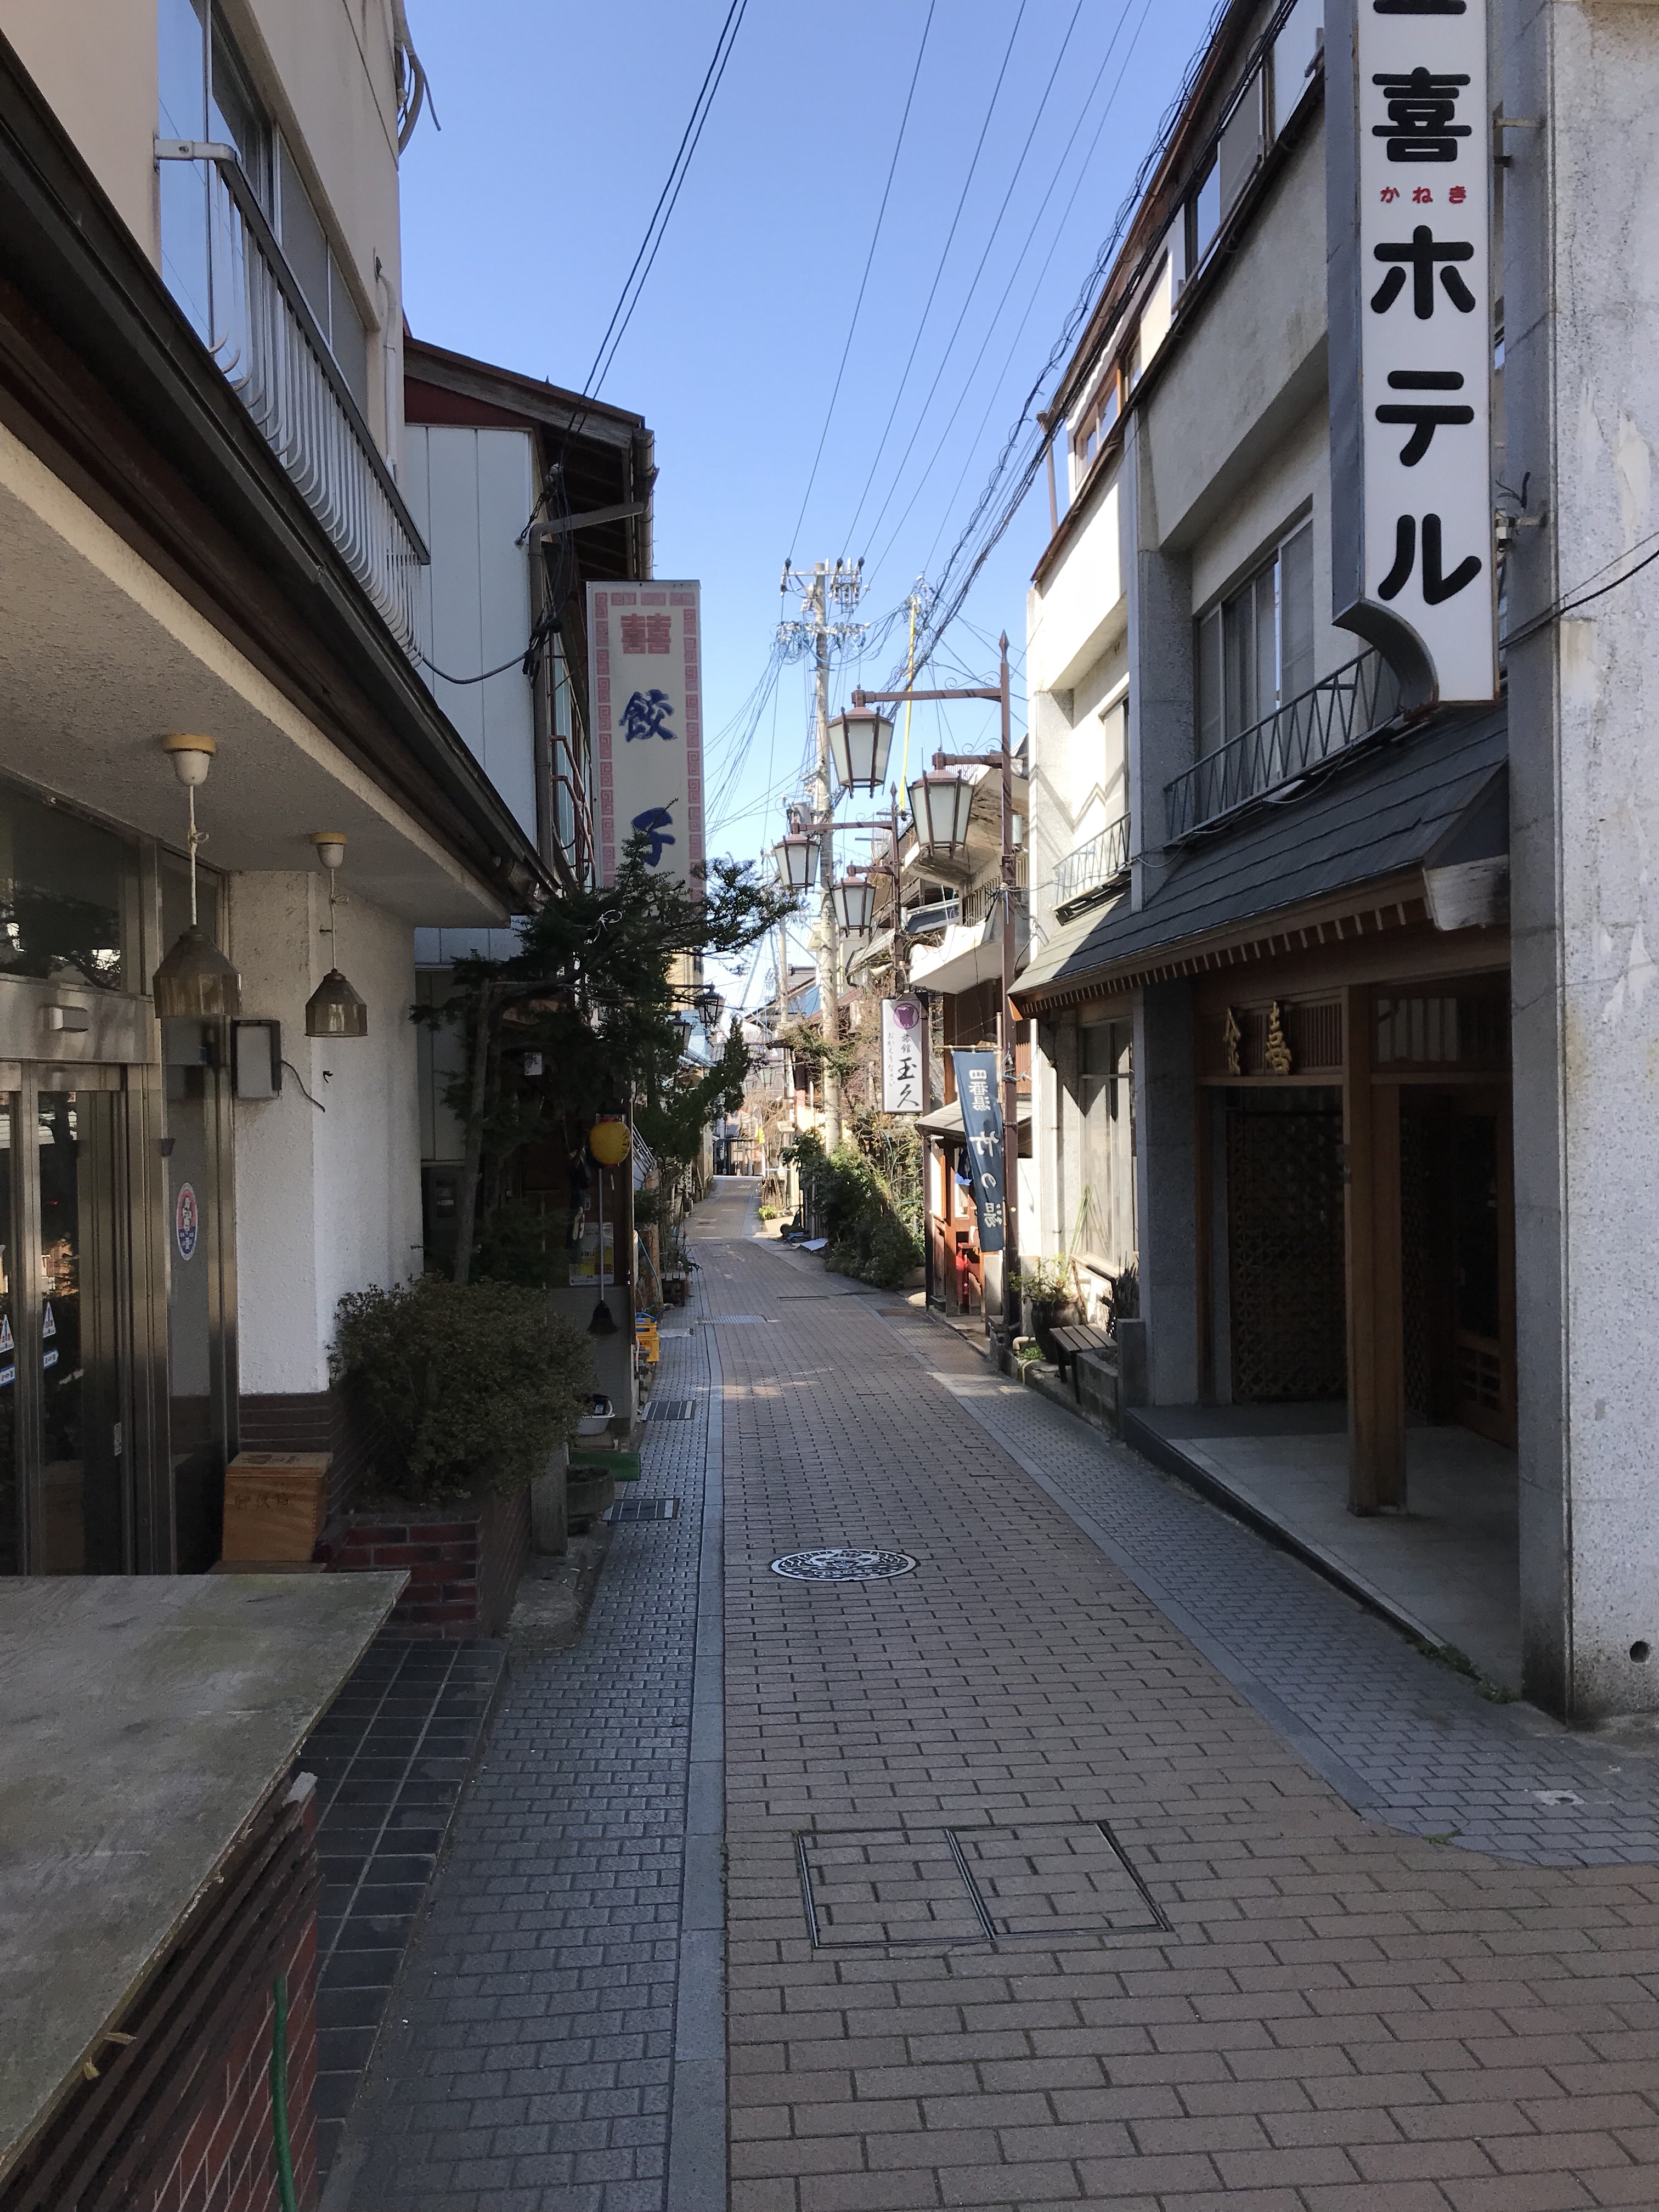
Suminoyu Ryokan

Suminoyu Ryokan was similar Matsuya in many ways, thought it is a bit larger and a little more modern.

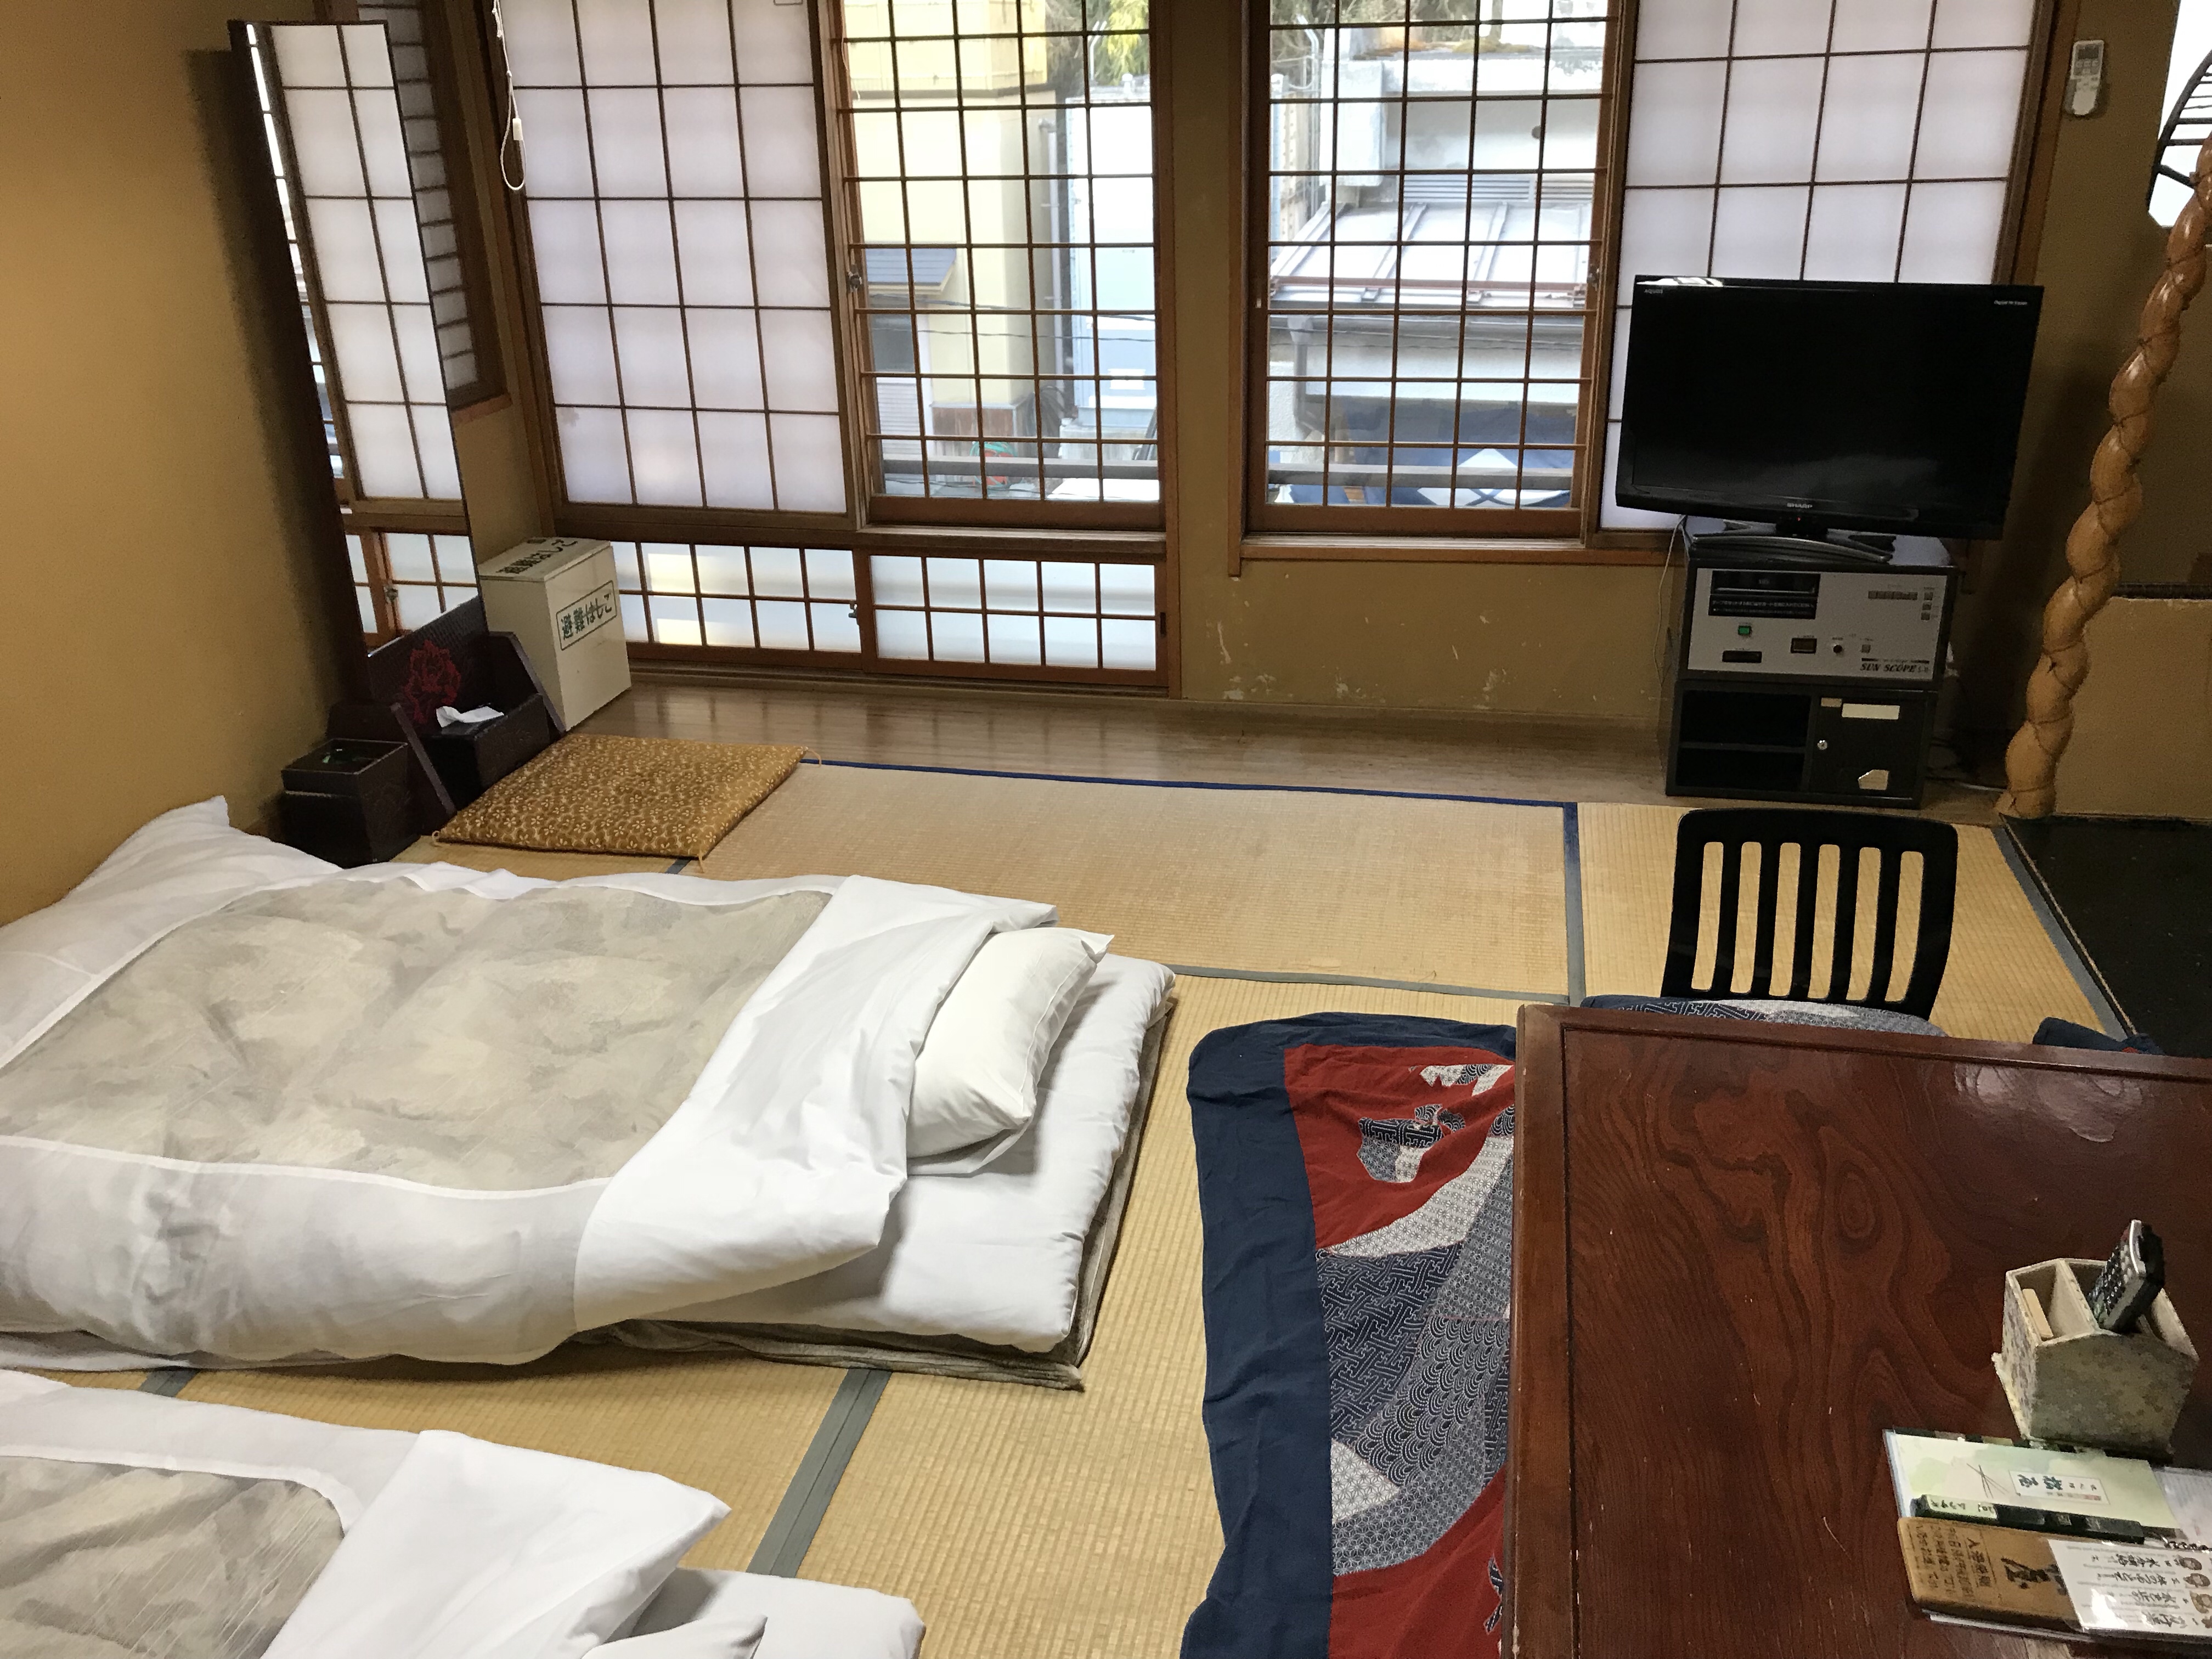
The room we stayed in was a little larger and had its own toilet. And rather than being in the basement, the public baths for the hotel are on the top floor. In addition to an indoor bath for soaking, there is also a smaller, outdoor one that looks out over the town and valley.

Both traditional dinner and transitional breakfast are included in the room charge, though Suminoyu served meals at western-style dining tables (seated in chairs) rather than seated on the floor.

Wearing a Yukata

One important aspect of staying in ryokan (especially in a little onsen town) is the traditional dress. A ryokan will provide you with a Japanese-style robe and belt called a Yukata.

It is fairly self explanatory to put on. The only important detail to remember is that the left side crosses over on top of the right side. Women should tie the belt around the waist with the knot in the front, to the side. Men should tie the belt a bit lower, around the hips, with the knot more toward the back.

There is a outer shirt which is optionally worn over the inner robe. Both ryokan we stayed at also provided a thicker, insulated outer layer in the lobby for wear in cooler weather. Near the door the ryokan will have traditional Japanese sandals (called geta).

Though it can feel a bit awkward at first, it is perfectly acceptable to wear this robe as your clothing when walking around the hotel or going outside to visit the onsen. (I would recommend changing into more normal street wear for longer walks between neighborhoods or to go visit snow monkeys).

Day 2

Since we had already visited the snow monkeys, we took the next day a bit slower. After taking a nap after breakfast, we walked about 1.2 kilometers to the Daihiden Temple.

Daihiden Temple

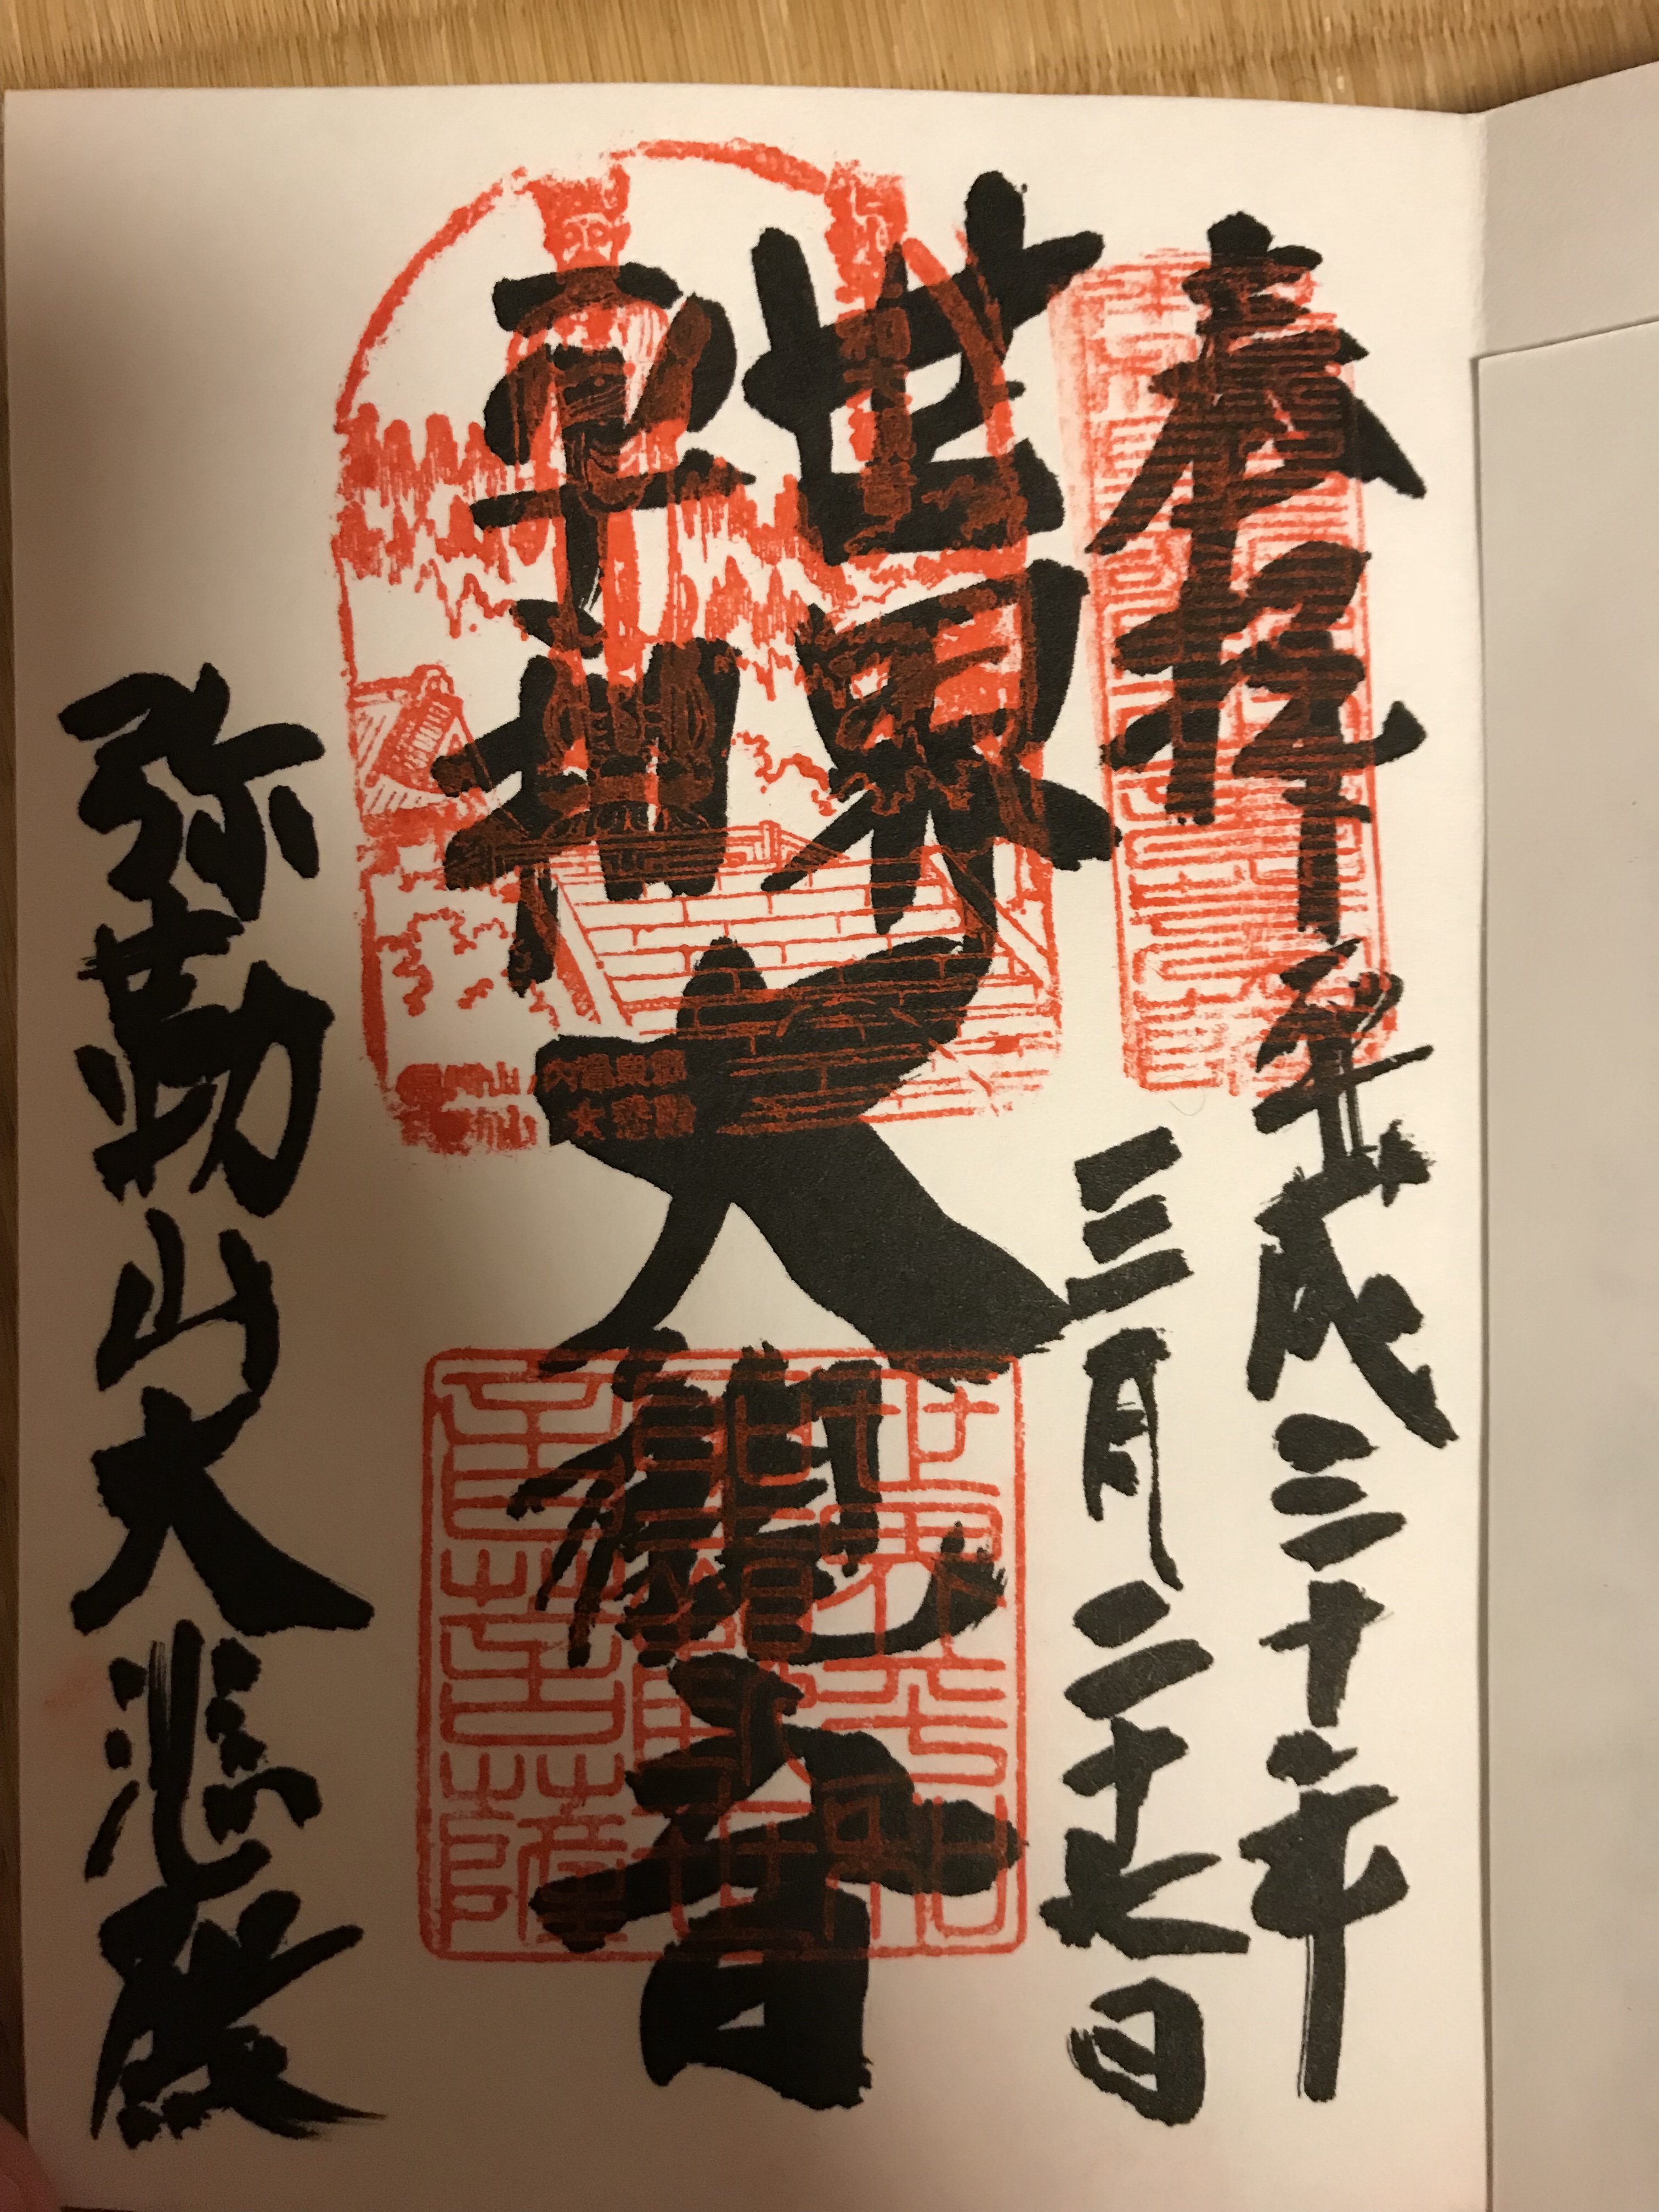
Daihiden Temple is located about 1.2 kilometers back towards the Yudanaka train station. It is easily found by following the main street of Shibu Onsen back in the direction of the station. The temple is home to a 25 meter tall female Buddha stature, built in the aftermath for World War II as a symbol for world peace. The top of the statue is easily seen from the road and from the courtyard outside of the temple, but I would recommend going inside the main temple building for a look around. Admittance is 200 JPY per person. (If you’ve started collecting stamps from temples, you can also pay 300 JPY at the entrance for a stamp in your book.)

You start in the main hall, which has a shrine hosting a smaller version of the statue that is located outside. There is also a large drum that you can give a big “thump” in order to bring good luck. Note that this isn’t a major tourist destination, so there is very little English text available. However, at the time we were there, one of the staff of the temple did his best to explain with gestures and pointing to images (and a tiny bit of English) the significance of what we were seeing. Facts such as that this is the 3rd largest bronze Buddha statue in Japan.

On the right side of the main hall there is a hallway that will take you to a room located under the large bronze statue. This room contains small versions of 33 different statues that come from 33 different temples around Japan. As visiting temples is supposed to bring positive karma, the idea is that a visitor to this temple can gather some of that karma by proxy through these 33 different Buddhas. Circle the room counter-clockwise. You can gently ring the bell in front of each station and say a prayer or pay respect in which ever way you are accustomed to.

From here, go down one floor and through a narrow hallway with low ceilings. At the far end there is a statue of Amitabha Buddha. Continue around the hallway and back to the second floor, then proceed up the stairs in the center. This will take you to the elevated platform which hosts the large bronze statue, giving an even better view of the statue and its construction.

At the front of the statue there is some calligraphy. Patting the three different characters (right to left) and then running your hand over the inscription of on the left, is said to bring good fortune. If you’re unsure of which characters to touch, they will be the ones that have been polished by the hands of other visitors.

Soba Noodles for Lunch

We at lunch on the way back to our accommodations, this time having soba noodles at Tamagawa.

Much like the ramen place, this restaurant has a simple menu of noodle dishes. English menus with pictures are available. Dishes were in the same price range, from 700 to 900 JPY. The food was delicious. This restaurant also serves desert (but only if taken as part of a meal).

More Onsen

We spent the remainder of the day exploring the little shops in Shibu Onsen. We purchased a box of buns with various stuffings to snack on during the 3 hour train ride back to Nagoya. Before dinner we visited a few more of the baths in town.

Numbers 4 and 5 were our favorite. As they were not located on the main street they tended to not be as crowded and overly used. Number 9, as it was the only one that could be used by day visitors, was the largest and the most crowded.

I did manage to visit all nine of the baths in Shibu. In order to keep track of your progress, the ryokan (and many of the gift shops) sell a towel which lists all of the public baths. Each bath has two stamps that you place on your towel after you visit (self-service, honor system). Be sure to find a completed towel on display (most likely posted somewhere in the lobby of your ryokan) to understand where to place each stamp. Note that the baths are listed on the towel from 1 through 9 (right to left), except for the larger text in the middle, which I will explain below.

After visiting all 9 baths, go to the Takayakushi Temple. It is at the top of the long stairs across the street from bath number 9. The last stamp can be found at this temple and goes to the item in the middle of the commemorative towel. Visiting all 9 baths and the temple is said to bring divine favors.

Other Notes on Logistics

A few other miscellaneous notes on Shibu Onsen.

Shopping

There are a number of little souvenirs and bakeries located around Shibu Onsen, and no shortage of opportunities to buy souvenirs or Japanese treats. The hours can be a little unpredictable: shops close for lunch, may close early in the evening or late, and some days may not open at all. If you don’t have much time remaining during your stay and you see a shop that looks interesting to you, it is better to go while you know it is open.

Eating

Similar to the little shops, restaurants work limited hours. Your hotel can provide a list of restaurants and the days/hours they are open.

Cash and ATMs

Stores and restaurants generally only accept cash. The ryokans we stayed at also accepted cash only (even if you provided a credit card at the time of booking.) There is a single ATM located in Shibu Onsen next to the post office. It would be wise to make sure you have enough cash with you before you go to pay for accommodations, meals, tickets, and some shopping.

Hot Springs are Hot

The water used to feed the public baths is incredibly hot and there is no effort made to protect yourself from your own carelessness in these baths. Be sure to test the water before entering, and use the cold water taps to cool the bath if it is too hot for comfort. (Just make sure to turn off the cold tap before you leave.) Be sure to drink lots of water as well.

Tattoos

If you have any tattoos, they must be covered up when in a public bath.

Taiwan/Japan 2018 – Day 8 – Osaka to Yudanaka

Journey to Yudanaka (gateway to snow monkeys)

Today we are beginning the second major leg of our trip up in the mountains.

We grabbed breakfast in the hotel before taking the subway to the Shin-Osaka train station. From Osaka, it is about a 5 hour trip Yudanaka station.

This time we will be traveling by:

  • Shinkansen from Osaka to Nagoya
  • Limited Express from Nagoya to Nagano
  • Limited Express from Nagano to Yudanaka

The lines through Nagano are operated by JR, so it is possible to purchased tickets for the first two segments at our departure point, Shin-Osaka. Do not use the normal JR ticket vending machines, but rather look for machines labeled to sell reserved-seat tickets or Shinkansen tickets.

Note that not all of the machines take cash, and if you are paying by card, you must have a card that can use a PIN rather than signature. (Barclaycard Arrival+ is a card we carry because it is unique amongst US credit cards for being a credit card while also supporting chip+PIN). If you encounter any difficulty with payment, the JR ticket offices can accept all forms of payment. Once switched to English, use of the ticket machines was self-explanatory, including the selection of seats.

For our purchase, the ticket machine gave us each three tickets: one “fare” ticket from Osaka to Nagano, one reserved seat ticket for the Shinkansen to Nagoya, and one reserved ticket to Nagano. To enter the Shinkansen area, stack your “fare” ticket and seat ticket for the Shinkansen and place them together into the turnstile. Through magic it will scan and validate both tickets. If you have any questions about which ticket to insert, the gate staff can help you figure it out.

Changing Trains in Nagoya

When arriving in Nagoya, one again passes the “fare” ticket and Shinkansen seat ticket through the turnstile from the Shinkansen to the regular JR area. The seat ticket is consumed but your fare ticket is returned to you. Here, it didn’t require the seat ticket to Nagano to be put through the machine (though I’m not sure what would have happened if I tried). Again, if confused or the machine unexpectedly rejects it, just ask for help. And if you don’t know how to ask, just hand the staff near the turnstile your tickets and look confused. They’ll sort you out. Just be sure you’re not going through turnstiles to exit the station but rather transferring straight to the JR trains.

It is likely that your transfer time may be tight, so proceed swiftly to your train.

On the train to Nagano, show your fare and seat ticket to the inspector when they pass through the train.

Thoughts on Food

As I sit here on my third hour on a train, well past lunch time, I regret not buying a boxed lunch either at Shin-Osaka or on the Shinkansen. The Limited Express train to Nagano (3 hours) hasn’t had any food for purchase. Be sure to plan ahead for your appetite and don’t rely on the availability of food on the train.

Changing Trains in Nagano

We had about one hour after arriving in Nagano before our next train. We addressed our appetites by visiting one of the bakeries that is so common throughout Japanese train stations. While it felt that we had travelled a long distance from the “big city”, the train station in Nagano had many shopping and dining options available. Our layover went by very quickly.

At Nagano, transfer to the Nagano Dentetsu Line to travel to Yudanaka Station.

The Nagano Dentetsu line isn’t operated by one of the JR companies and has its own ticket kiosk, gates, etc. However, it works the same. Buy a small ticket using the map above the kiosks to determine the correct fare. You’ll most likely want to take the Limited Express train, which has a total fare of 1260 JPY. (There is also a commuter train, which makes many more stops along the route).

There are no automated turnstiles; your ticket will be checked by an attendant.

The train from Nagano to Yudanaka station is about 50 minutes long. Note that once you go through the gate to the platform, there aren’t any facilities such as restrooms or vending machines. The trains show their age a little bit, but remain adorable.

Arriving in Yudanaka

Yudanaka is a very small train station, though there are a number of taxis waiting outside and busses that depart from here. Our Ryokan (transitional Japanese-style hotel) provided free transfer from the train station. Upon arriving in Yudanaka, I called our Ryokan and they arrived in about 15 minutes to pick us up. The hotel is located in Shibu Onsen, about 5 minutes by car. (Onsen meaning hot spring.)

Matsuya Ryokan

Because we booked this trip last minute, we were not able to book three consecutive nights at any one hotel. We spent our first night at Matsuya.

The rooms are in the traditional Japanese style with tatami floors. Our room had a sink, but no toilet or bath. Our room was a larger size and was laid out both with space for sitting and futons for sleeping. Smaller rooms may be configured only for one option at a time (in which case the staff moves the table and lays out the bedding while you eat dinner).

Dinner and breakfast were included in our booking. We had dinner at 6 pm, about 1 hour after we arrived.

The meals are traditional Japanese food: small plates of a variety of things, such as soup, sushi, pieces of smoked fish, pickled vegetables, tempura, and so on.

It was all incredibly delicious and filling. Dinner was served with plum wine.

Onsen

After dinner we went out to enjoy what this location is famous for: the hot springs. The town contains 9 different bath houses that are fed by hot springs. These are used by local residents, but are made available to visitors staying overnight in town. (Only one is available to day visitors.) Each facility is very small. In each, there is a separate section for men and women. After taking your shoes off, there is a small room for undressing (sorry, swimsuits not allowed), storing your belongings on shelves or in baskets, and then another small room containing the onsen.

The onsen itself is just a small, deep, rectangular bath set into the ground. It is lined either with stone or wood. Before stepping into it, you use a provided bucket (and optionally shampoo/soap). The tub itself is meant to remain clean and free of contaminants, and is just used for soaking.

In addition to the 9 shared onsen, each hotel has its own shared bath (again, divided into men/women) which is also fed by the natural hot spring.

The bath in the hotel, while made of the same basic components, had more extensive supplies and space for actually getting yourself clean.

The water feeding the tubs is incredibly hot, so there is a cold water tap that can be used to add cold water to make the temperature more comfortable.

Taiwan/Japan 2018 – Day 7 – Himeji

Breakfast

To save time and travel today, we opted to eat at our hotel. There aren’t many options for breakfast around our neighborhood in Osaka, as most people in this city eat breakfast at home. The options that do exist have more of a western slant (eggs, pancakes, etc.) There are more grab-and-go type breakfast options at the major railway and subway stations, but we weren’t particularly close to any of those.

One Train Away: Himeji

The wonderful thing about Japan is that one can take a train to another major city with the same amount of planning involved in taking a bus to downtown Seattle from the suburbs.

The Special Rapid Service train to Himeji leaves from Osaka station (which again you can get to easily by subway). For JR Rapid Service trains, tickets work similar to those for subways. First, go to where the ticket vending machines are located and find your destination on the map. Many maps do not have English names for destinations, so it helps to know the characters for your destination. The map will tell you the price you need to pay, and then you can purchase that fare from a ticket machine. Some types of trains, such as the Shinkansen (bullet trains) require a seat ticket (reserved or unreserved) in addition to the fare. The special rapid service trains do not, but I haven’t figured out the hard and fast rule for how you know. (These is also a Shinkansen route to Himeji, but it was much more expensive for relatively little difference in time given the distance to Himeji).

If you ever have any confusion over the right type of ticket to buy, you can always purchased JR tickets in person at a ticket office. As long as you know your destination, the helpful staff will ensure you leave with the right tickets. There is also an official app, “HYPERDIA”, which can plot the route and determine the fare between any two stations in Japan.

Anyway, as with the subway once you have your ticket you board by inserting your ticket into the turnstile. Then, find the right platform and board your train. On a train without seat tickets, you may have to stand if it is especially busy.

Arriving at Himeji

The train to Himeji was about 1 hour. From Himeji station, the castle is about 1 km away. This is easily walkable, or you can follow signs to the bus terminal located adjacent to the train station. Given the popularity of Himeji Castle as a destination, there are signs in English which will help you located a bus that stops there.

A word on Japanese busses: fares are traditionally paid when you get off. Board at the back of the bus. When you board, unless you are boarding at the start of a route, there will be a dispenser near the rear door which dispenses a small paper ticket with a number on it. When you get off, match the number on this ticket with a digital sign at the front of the bus which will tell you the correct fare to pay. Place the paper ticket and your fare in the fare box as you get off. The fare box is usually a clear box on the pedestal next to the driver. Below that there may be slots for exchanging bills or coins for change.

The fare from Himeji station to the castle is 100 JPY.

Himeji Castle

Admission to Himeji castle is 1000 JPY.

The castle is aesthetically similar to the Osaka castle (at least to my untrained eye). However, there is one important difference: Himeji castle was never destroyed, so the structure you see before you is more or less original. (It has undergone restoration and preservation work at various times, but those projects have strived to retain as much of the original structure as possible). Unlike Osaka Castle, which has a completely modern interior with a museum, the interior of Himeji castle is much as it was when originally constructed.

As such, you won’t find anything in the way of exhibits or expository signs once you are inside the castle. Instead you should treat the castle itself as the exhibit. Pay attention to the details of construction, the size of the timbers used, while keeping in mind the age of the structure you are exploring.

Himeji Gardens

After exploring the castle and surrounding grounds, exit back through the main gate, over the moat, and turn right to head toward the gardens.

The admission to the gardens is 300 JPY, but a combination ticket which gives access to the castle and gardens is available for 1040 JPY.

If time allows, make sure to stop at the tea house to participate in the ritual of receiving matcha tea and a sweet bite to eat. The cost is 500 JPY. Once paying, you’ll proceed to a traditional room with tatami floors and kneel along the edge with other guests. The hostess will bring you a tray with a small, sweet pastry and a cup of matcha tea. Be sure to bow when the hostess bows and say “otemae chodai itashimasu” as thank you for the tea. Eat the pastry first and then drink the tea according to the instruction sheet.

Returning to Osaka for Dinner

After the gardens we took the train back to Osaka station.

Near the station, Yuling located a Japanese barbecue restaurant for dinner near the station by the name Yakitori.

The restaurant serves mainly various meat and vegetable combinations, skewered on bamboo sticks, and cooked on a charcoal fire.

Taiwan/Japan 2018 – Day 6 – Osaka

Breakfast

We started the day by returning to the subway station near our hotel. To save money on subway tickets (as we planned to be jumping around the city by subway a lot that day) we purchased day passes from the ticket vending machine for 800 JPY each. Note that the day passes are not RFID cards but rather work the same way as single journey tickets; you insert them into the turnstile and retrieve it after passing through.

We exited at the Tanimachiyonchome station and had breakfast at Gout, a coffee and pastry shop.

These kinds of shops are common around Japan, but more so in busy subway and train stations. You use tongs to place whatever pastry items you’d like on a tray, and then go to the counter to pay and order any beverages.

From here it was only a few blocks to Osaka Castle.

Osaka Castle

Osaka Castle, though constructed to look like the historical castle that once stood at this location, is a modern reconstruction externally and houses a museum on the inside. Unless you’re really interested in the history and politics surrounding the construction of the original castle that once stood here, the museum is not terribly interesting. However, 600 JPY is a fair price to pay to at least go to the top floor and enjoy the view from the observation deck.

Tickets are purchased from a vending machine near the base of the castle. Note that ticket vending machines in Japan work a bit backwards from how western ticket machines generally work (though more like how our beverage and snack vending machines work): you insert money first and the machine then gives you options based on the balance you’ve inserted.

Approaching to castle, you’ll have the option of either taking the stairs or elevator to the top floor. Note that either way the recommended circuit starts at the top floor, so it is really a question of time spent waiting for the elevator versus physical exertion. Just inside the entrance of the main tower there is a desk offering free audio guides. Our advice is don’t bother. The audio doesn’t contribute anything to the exhibits and just tells you there are things to read on each floor.

The view from the top is really the highlight of the experience, so don’t feel too rushed to start the decent.

After you’ve finished at the top, take the stairs down through each floor. The upper floors contain a static exhibit of the history of the castle and its lord, the lower floors contain a rotating collection of historical artifacts.

Back outside the ticket gates we stopped at Miraiza, a more modern, commercial building located outside the ticket gate for Osaka Castle. Here we shared a matcha latte from Tully’s. This same building has many stores selling souvenirs. Even if you’re not looking to buy anything, it is worthwhile to take a pass though.

Hokoku Shrine

Next to Osaka castle there is also a Shinto shrine. Inside and to the right of the entrance is a booth selling various blessed charms. One of the more common things to see people purchasing is their fortune. Next to the window is a large cylinder with a small hole on the top. You shake the cylinder and extract one rod from the cylinder. This rode will have a number written on it. You then exchange this for your fortune.

If you plan on visiting several shrines during your drip, you can also purchase a blank book. At each shrine or temple you visit, you can pay to have inscribed in the book a mark that is unique to that location. The cost at each shrine will be around 300 JPY, but may be more at more popular locations. The complexity of the mark also varies from a simple stamp with red ink to multiple lines of hand-written calligraphy (the later actually being more common in my experience).

Lunch

We travelled by subway to Curry Yakumido for lunch. Curry Yakumido is a very small shop (only 4 seats) owned and operated by single individual. Three curry dishes are available: beef, vegetarian, and mixed. Additionally, coffee and whiskey are available upon request. The food is good and the company is even better. The chef/owner is very amicable and happy to chat while you enjoy your email.

He suggested we visit the Osaka aquarium, Kaiyukan, so we headed there next.

Kaiyukan (Osaka Aquarium)

Kaiyukan is a pleasant aquarium, if not that unique. The aquarium has a long path that snakes around various exhibits and tanks, about 1 km walking in total. Our favorite exhibits were the river otters and dolphins, the later which we caught during feeding time. Near the end of the aquarium there was also an enchanting jelly fish exhibit.

There are a couple of other attractions located in close proximity to the aquarium: boat tour, Ferris wheel, Lego discovery center, and ferry to the Universal Studios theme park.

Dinner in Dotonbori

Dotonbori is Osaka’s main nightlife area. It is quintessentially Japanese with crowded streets, bright neon signs, and elaborate storefronts. Based on previous research, we were headed to Mizuno Okonomiyaki, one of the many restaurants specializing in Okonomiyaki. Okonomiyaki is a think pancake make from egg, noodles, various meats and vegetable options, and topped with sauces such as mustard and mayonnaise. It is traditionally cooked on a griddle right at your table by the restaurant staff.

Mizuno is one of the more popular restaurants for this dish, but unfortunately its popularity has been detrimental to the quality of the experience there. The wait was about an hour to get in, and most unfortunately, for most customers they did not cook the Okonomiyaki at the table but rather prepared it in advance in the back and brought it out already cooked.

Given the great number of restaurants offering Okonomiyaki, we would recommend you choose a less popular restaurant, and perhaps even one outside of one of the main nightlife areas. Chances are the meal you have will be every bit as tasty, and you are more likely to have a more authentic experience.

Dessert

After your dinner, Dotonbori offers many decadent street-eats for desert, many of them involving loaves of bread and ice cream.

We opted for a something a little simpler. This stand, near the subway, sells little fish shaped (not fish flavored) pastries stuffed with either a red bean or sweet potato filling>

Taiwan/Japan 2018 – Day 5 – Goodbye Taiwan and Hello Japan!

Goodbye Taiwan

We had a quick breakfast at the same place as yesterday, Fu Hang Soy Milk.

After returning to our hotel and checking out, we walked for about 10 minutes to the Airport MRT station. Although on paper (at least according to Google), the bus gets you to the airport quicker, the MRT definitely surpasses it in terms of convenience.

Major airlines allow you to check in and get your boarding pass right from the MRT station, before you even leave downtown. And provided it isn’t more than 3 hours before your departure time, you can even check your back at the MRT station before embarking on the train.

The express MRT train takes about 40 minutes to reach the airport.

Once you exit the turnstile at the airport, if you have any balance left on your EasyCard, you can stop at the customer service counter to cash out your balance. However, be advised that the NT100 used to purchase the card initially is not refundable, only the money you loaded onto it.

Onward to Japan!

Final Notes on Taiwan

But before I close out on Taiwan entirely, I want to share a couple of miscellaneous tips from our trip:

  • Don’t be shy about taking busses. While the subway may seem less intimidating, Taipei’s buses are clean, reliable, and extremely convenient. The system can be easily navigated with Google Maps.
  • Except for the breakfast establishments, Taiwan gets going fairly late in the day. If you like to sleep in, this is an ideal destination for you. None of the areas we visited felt very “alive” before 11 am.
  • WiFi is everywhere. We have a T-Mobile plan which gives us free data roaming, but in Taipei you almost don’t need it. Restaurants have WiFi. Hotels have free WiFi. Many major tourist sites have free WiFi. Even busses and subways have free WiFi.
  • Cash is still convenient to have, especially for smaller restaurants. Don’t plan on using your credit card for everything.

Arriving in Japan

Our flight was delayed by about 30 minutes due to the runways being used for landing being changed. We at Kansai International Airport around 4 pm. Immigration took a little over an hour to clear. Japan has a unique system where an attendant helps you scan your passport and fingerprints at a kiosk and then you go line up for the actual immigration officer, presumably to make things more efficient.

We took a combination of JR train and subways to reach our hotel. JR runs a couple of the lines that run from the airport (the other company being Nankai). To purchase tickets for trains in Japan, you find the ticket vending machine and enter in your destination. The machine determines the correct price, collects fare, and dispenses a ticket which you use to go through the turnstile.

However, one thing we overlooked when going through these motions is that there is a “rapid” train and a “limited express” train that basically follow the same route from the airport into central Osaka. The later requires the purchase of an additional seat ticket (either reserved or unreserved), while the former requires only the fare between two stops. We were exhausted from traveling and gave up on figuring out how to get ticket for the faster “limited express” train, but as a result had a lot more stops and a less luxurious ride into town. (Note that you have to pay attention to which train you’re getting on, as there is no barrier or turnstile to prevent you from going to the platform with the “limited express” train when you only have fare for the “rapid” train).

One train and two subway lines later, we were at our hotel, well past 7 pm.

We had dinner at an udon noodle place less than a block away: Tsurutotan. Large selection of udon offerings, plus some hot pot style things and sushi. Would eat again.